SQL Developer Hints to Format Output
9/17/2013 12:21:00 AM
10,"ACCOUNTING","NEW YORK"
20,"RESEARCH","DALLAS"
30,"SALES","CHICAGO"
40,"OPERATIONS","BOSTON"
20|"RESEARCH"|"DALLAS"|
30|"SALES"|"CHICAGO"|
40|"OPERATIONS"|"BOSTON"|
"10" "ACCOUNTING" "NEW YORK"
"20" "RESEARCH" "DALLAS"
"30" "SALES" "CHICAGO"
"40" "OPERATIONS" "BOSTON"
REM INSERTING into scott.dept
SET DEFINE OFF;
Insert into scott.dept (DEPTNO,DNAME,LOC) values (10,'ACCOUNTING','NEW YORK');
Insert into scott.dept (DEPTNO,DNAME,LOC) values (20,'RESEARCH','DALLAS');
Insert into scott.dept (DEPTNO,DNAME,LOC) values (30,'SALES','CHICAGO');
Insert into scott.dept (DEPTNO,DNAME,LOC) values (40,'OPERATIONS','BOSTON');

BEA-337 Incidents on OMS 12c
9/05/2013 06:17:00 PM
Problem Key: BEA-337 [WebLogicServer]
Error Message Id: BEA-337
Description
-----------
Incident detected using watch rule "StuckThread":
Watch ServerName: EMGC_OMS1
Watch RuleType: Log
Watch Rule: (SEVERITY = 'Error') AND ((MSGID = 'WL-000337') OR (MSGID = 'BEA-000337'))
Watch DomainName: GCDomain
Watch Data:
SERVER : EMGC_OMS1
MESSAGE : [STUCK] ExecuteThread: '7' for queue: 'weblogic.kernel.Default (self-tuning)' has been busy for "611" seconds working on the request "weblogic.servlet.internal.ServletRequestImpl@70733a9e[
POST /em/websvcs/emws/ConsoleJobStepExecutorService HTTP/1.1

Is Database 12c Supported on Exadata?
9/03/2013 06:23:00 PM
Answer is yes, even you can see 12c is listed under supported versions in document [888828.1].
However, there is a couple of buts (you should see this coming). Since latest Exadata Storage Software (version 11.2.3.2.1) does not have new offload libraries, smart scan offload filtering and storage indexes become disabled with 12c. Smart scans are initiated but nodes get back blocks instead of rows and columns in the projection list. Also IORM plans are not enforced and inter-database plans are disabled on cells. And finally, cell metrics display 12c databases under OTHER_DATABASE.
So, it seems better to wait until next Exadata update and probably 12c patch set update to upgrade your Exadata. At least, to be able upgrade to a fully functional state. Meanwhile, you'd better upgrade to 11.2.0.3 if you haven't yet because upgrading from 11.2.0.1 is not supported.
Installing Single Instance Oracle 12c Database on Linux
6/30/2013 11:47:00 PM
However mentioned package cannot be found on ULN. Instead install previous version's pre-install package. It does the job as well:
Create installation directory and grant required permissions:
$ mkdir /u01
$ chown oracle:oinstall /u01
$ chmod 775 /u01
As oracle, which is created by pre-install package, run the installer from the directory where you unzipped two installation zip files:
$ ./runInstaller
Graphical installation starts:
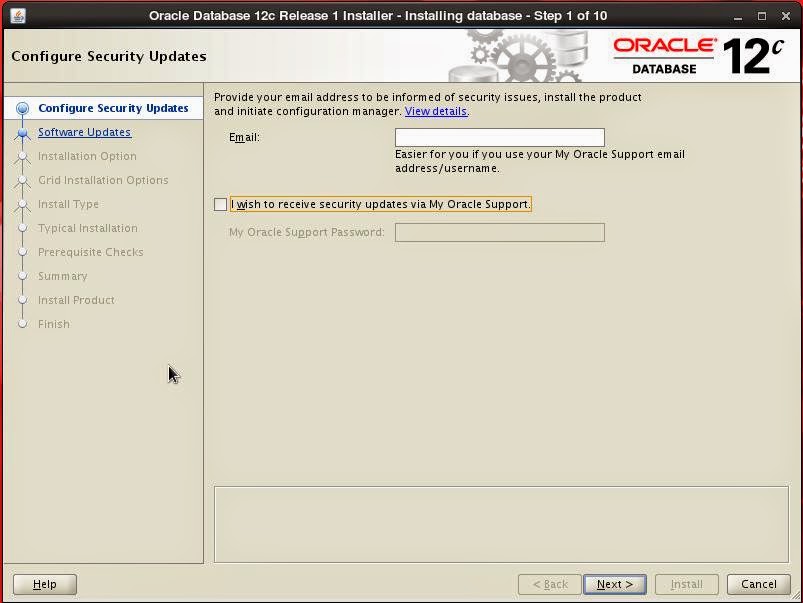
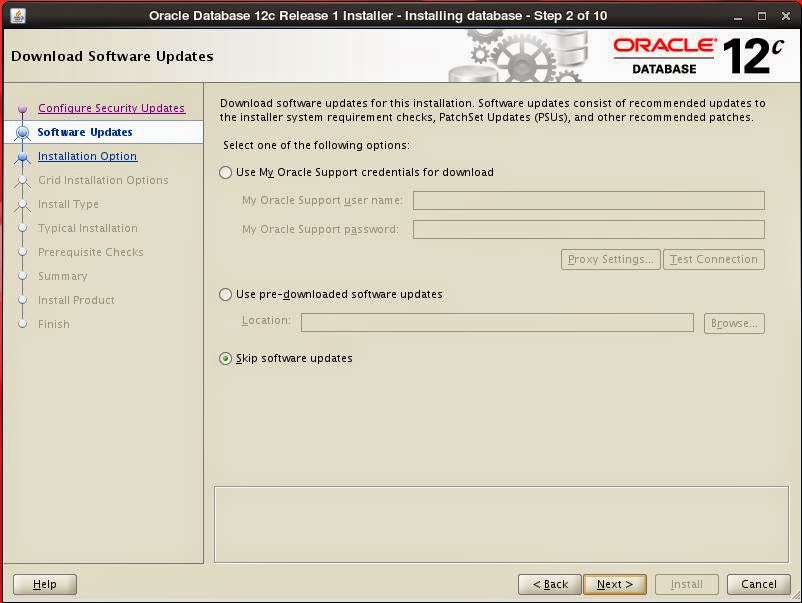
Skip updates
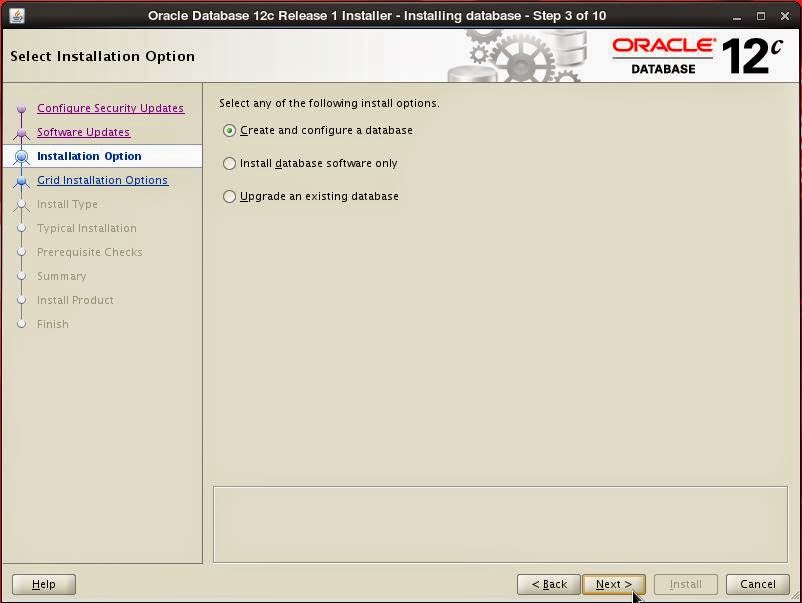
You can choose to create a database right after software installation or you can choose to install software first then run DBCA to create the database.
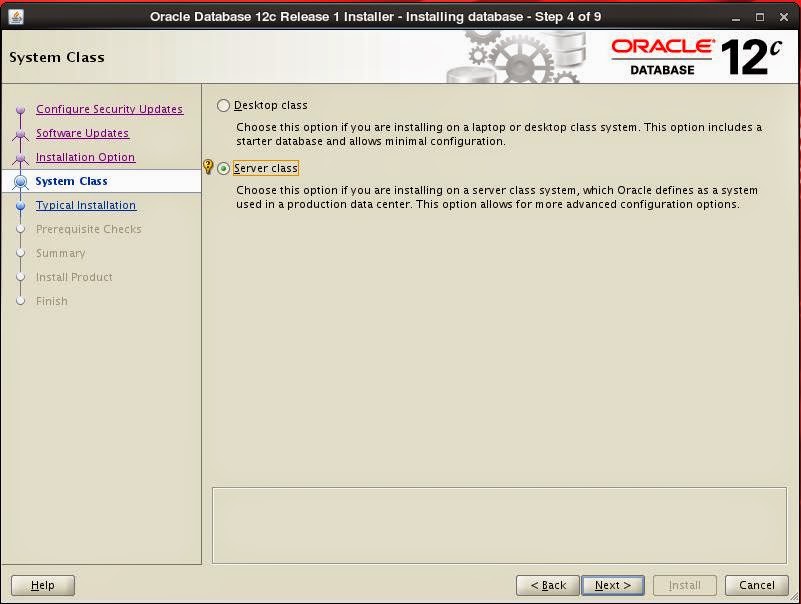
Select system class:
Select GI option:

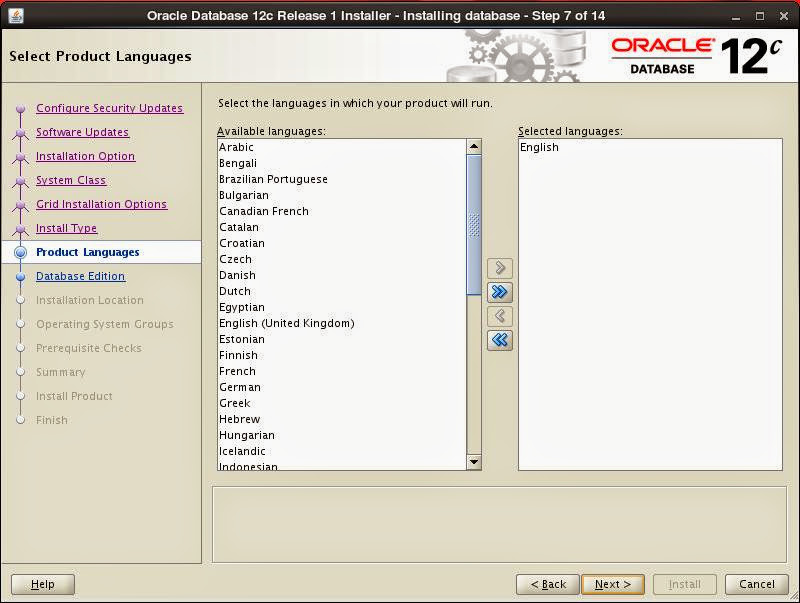
I choose to follow advanced installation path to see what is there:
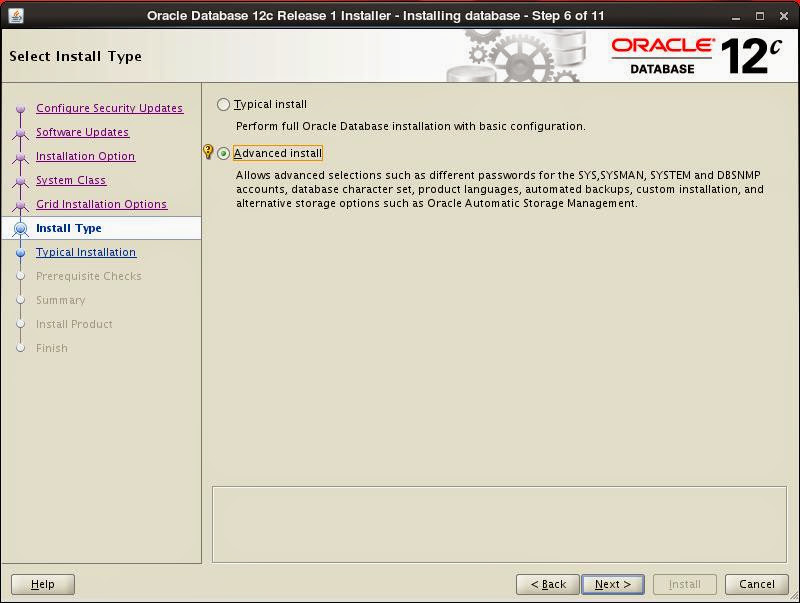
Select language(s):
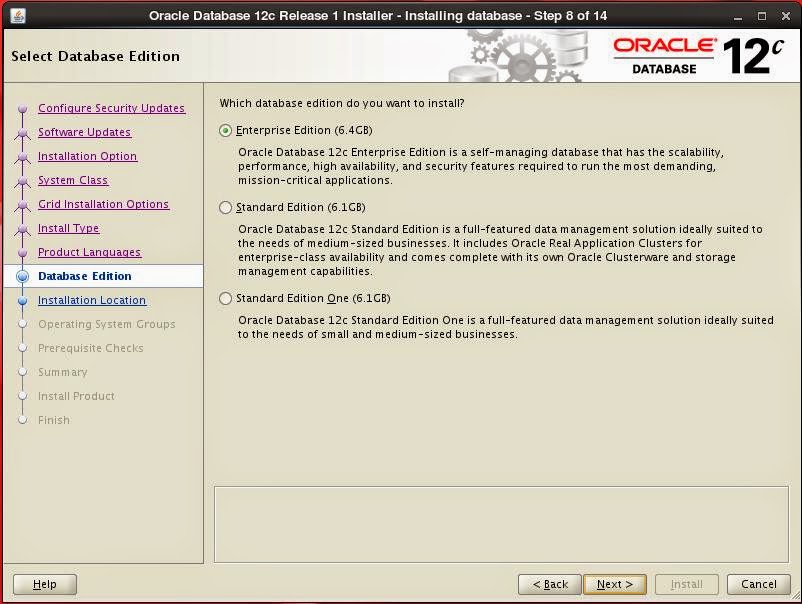
Select database edition to install:
Specify installation paths:

Specify inventory directory:

Select database type:

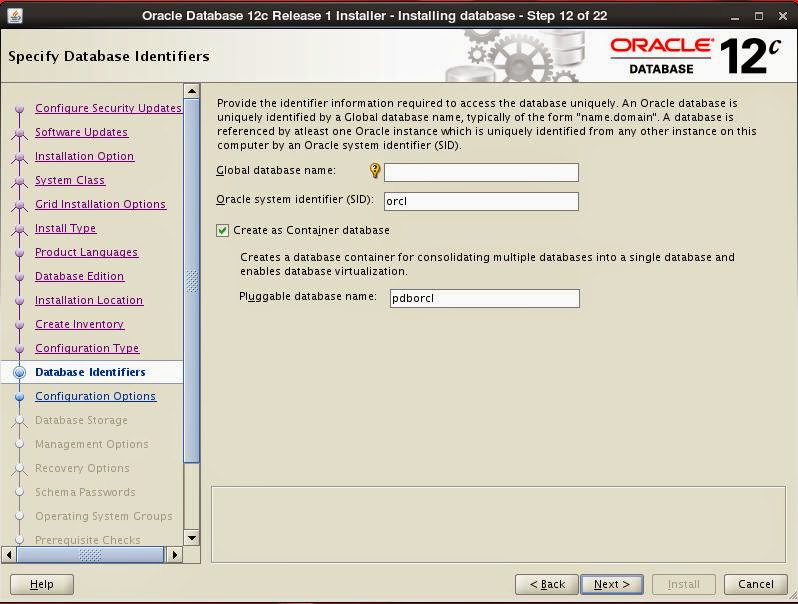
Specify database name. As a new feature, you can choose to create a multi-tenant database.
Configure database by specifying memory options, character set and sample schema installation:

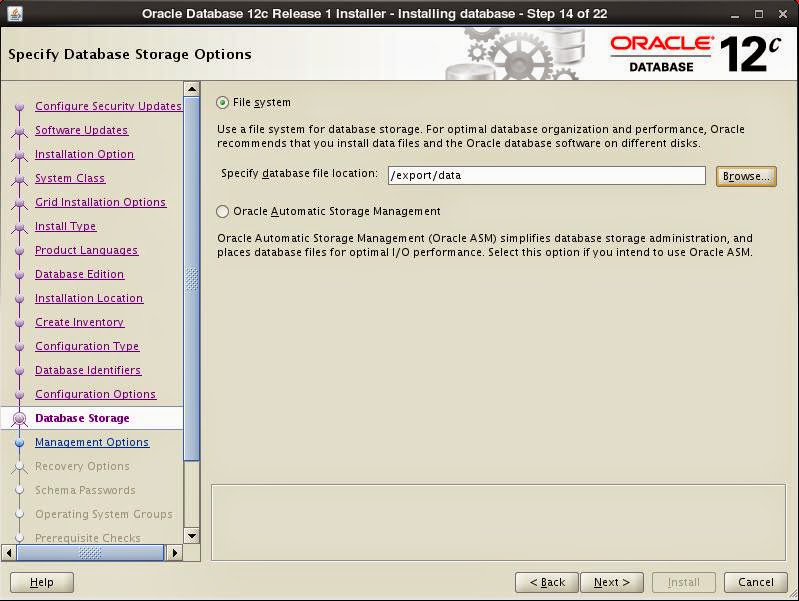
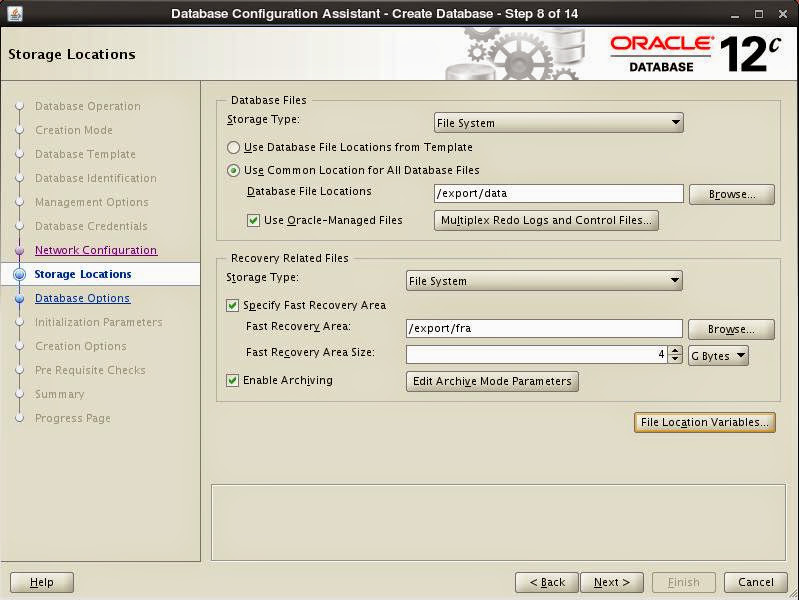
Specify storage, I set the path of mount point of NAS disk:
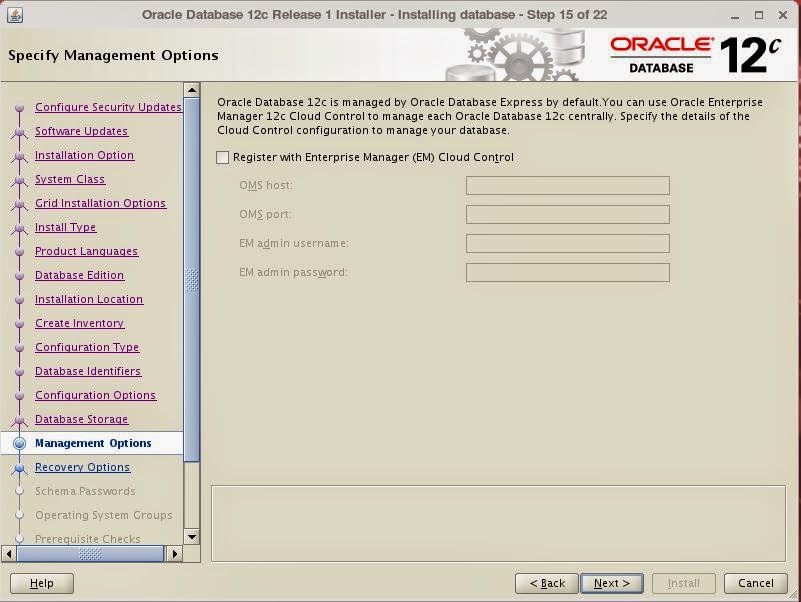
Specify Cloud Control details if you'll manage the instance through it:
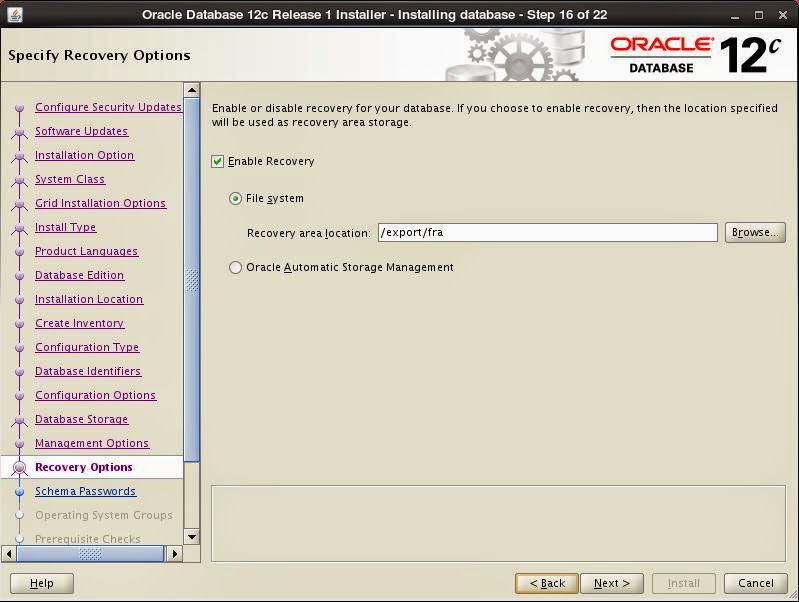
Choose to use FRA and set path -or ASM- for FRA:
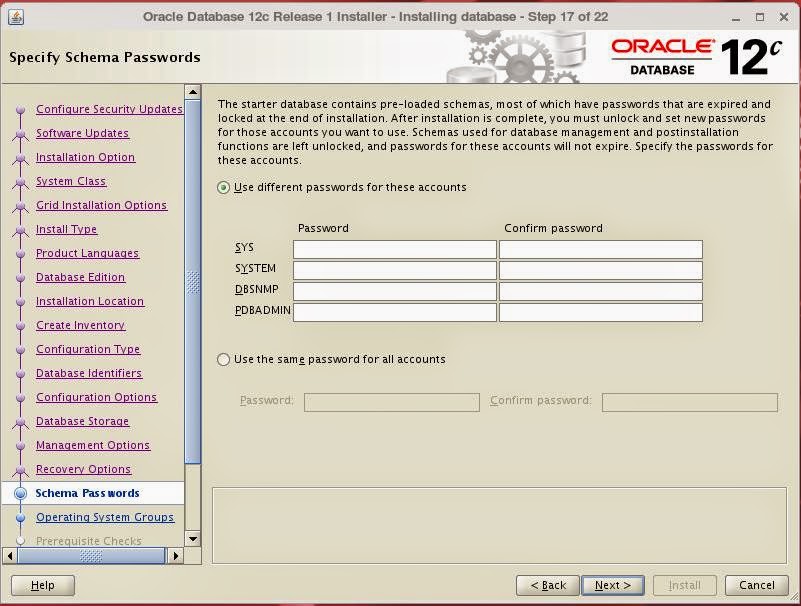
Set passwords for built-in users:
Set system groups:

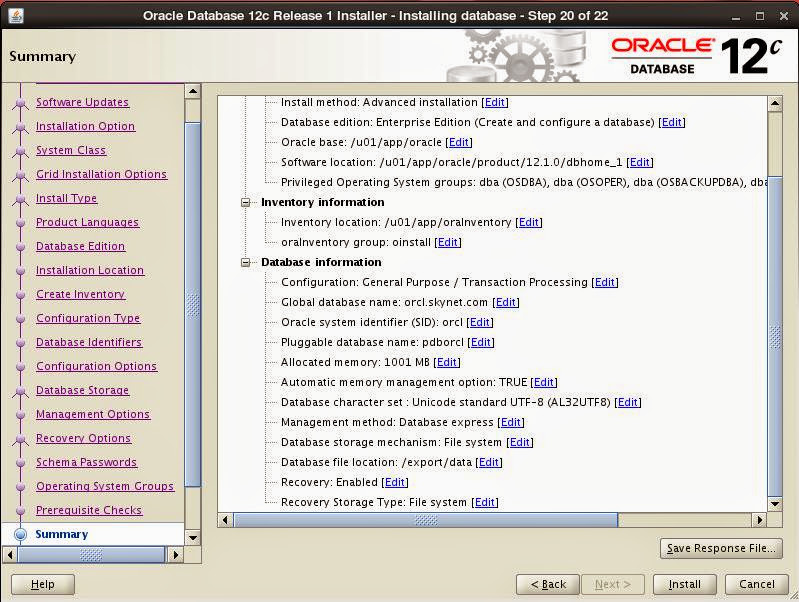
Investigate summary and if there's anything you need to chance:
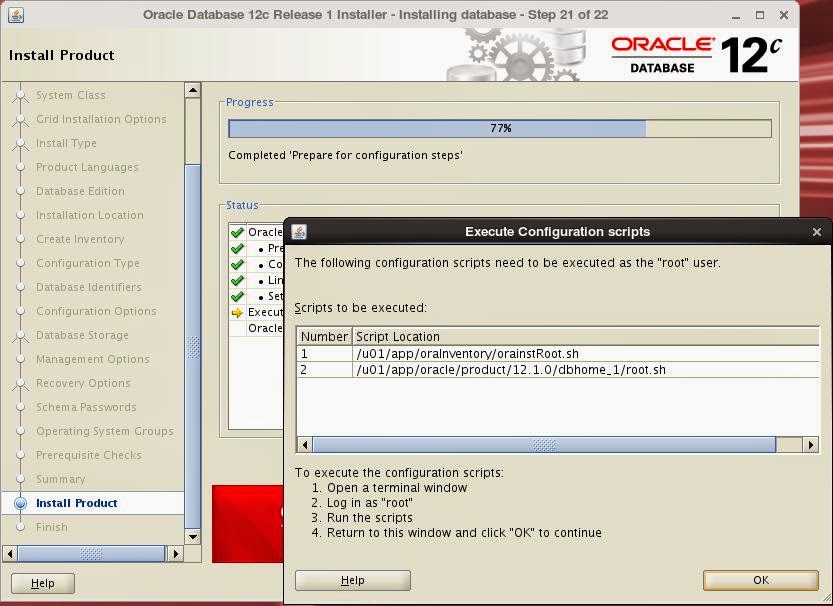
Installation starts. Run the root scripts when prompted:

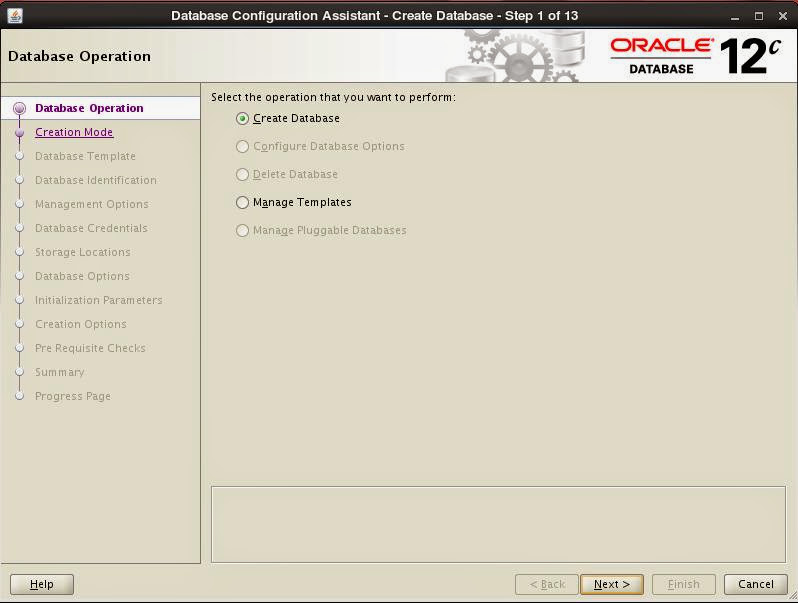
12c DBCA
If you choose to install software only during installation or installation failed to create the database - as I've experienced - you can run database configuration assistant (DBCA) which is located under ORACLE_HOME/bin:
$ cd /u01/app/oracle/product/12.1.0/dbhome_1/bin
$ ./dbca
Graphical installation starts:
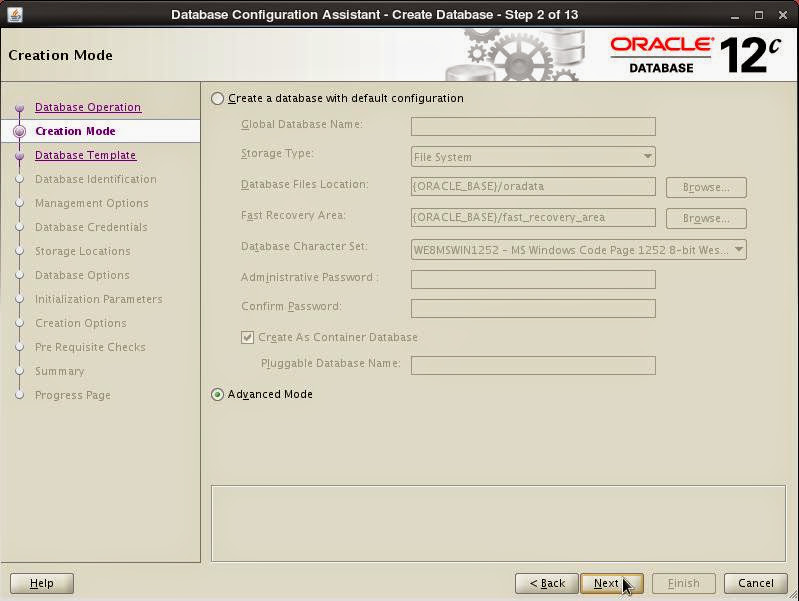
I choose to follow advanced installation path to see what is there:
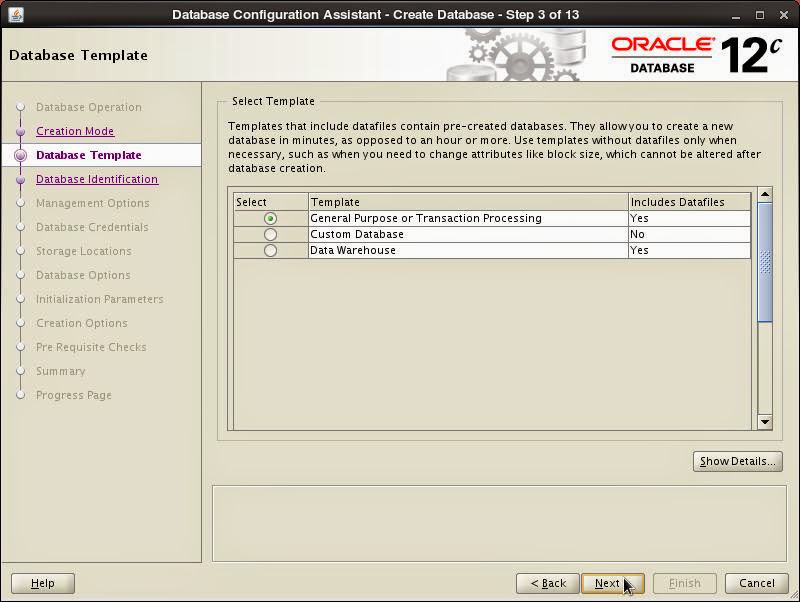
Select the template of database type:
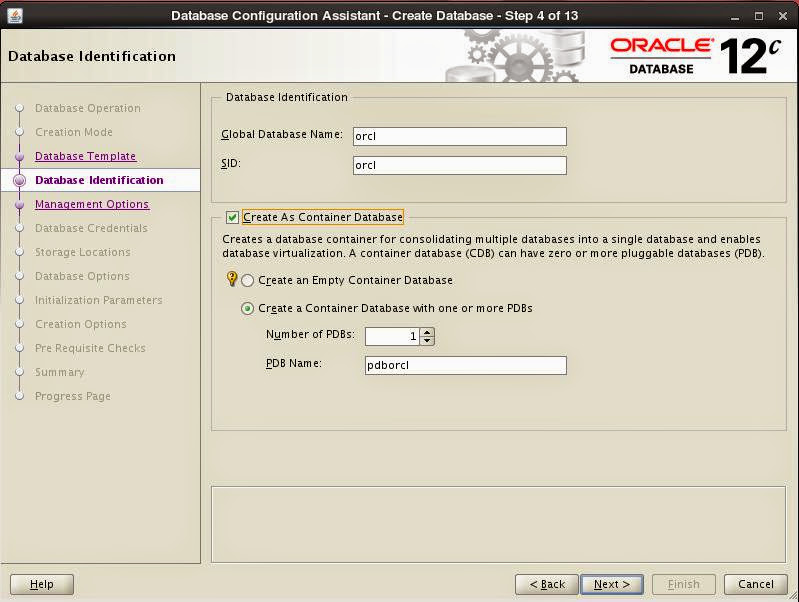
Set database names including container database:
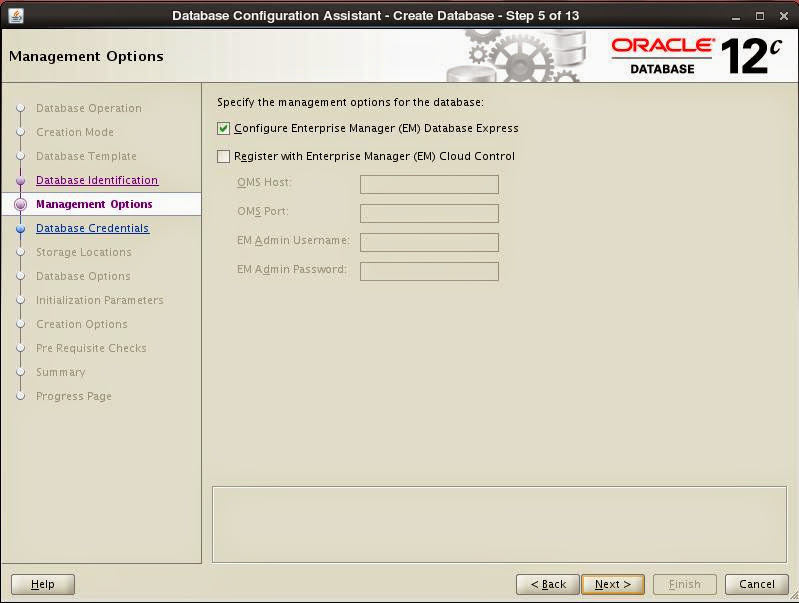
Choose to configure database with EM Database Express (previous version's dbconsole) or with Cloud Control:
Set passwords of built-in user:

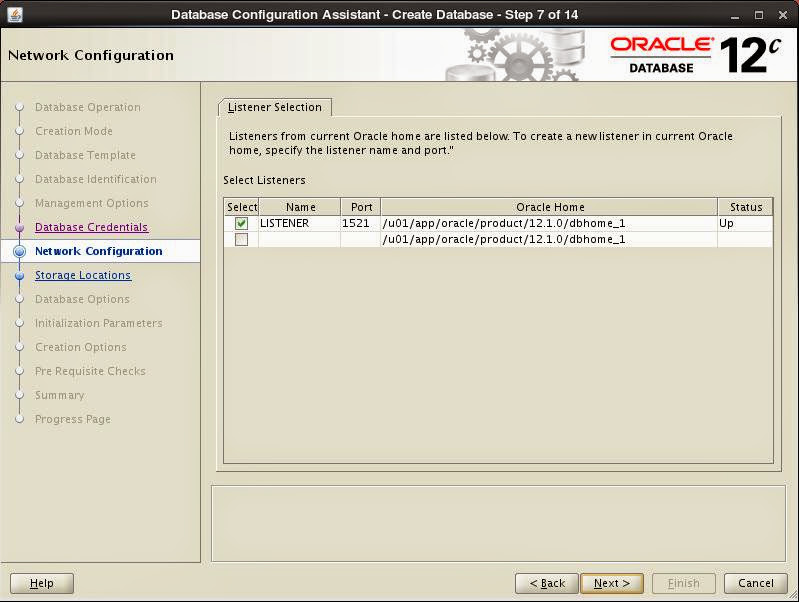
Set listener configuration, leave it as default:
Set storage specifications:
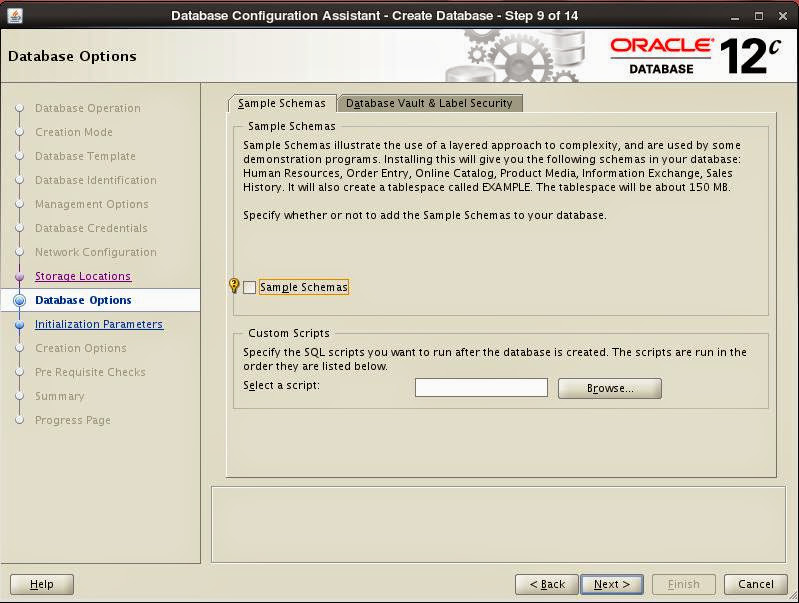
Set database options:
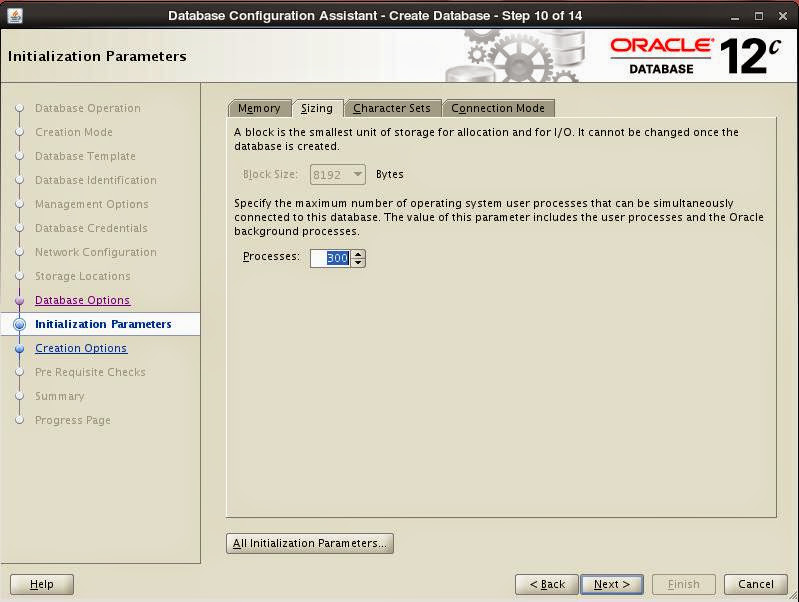
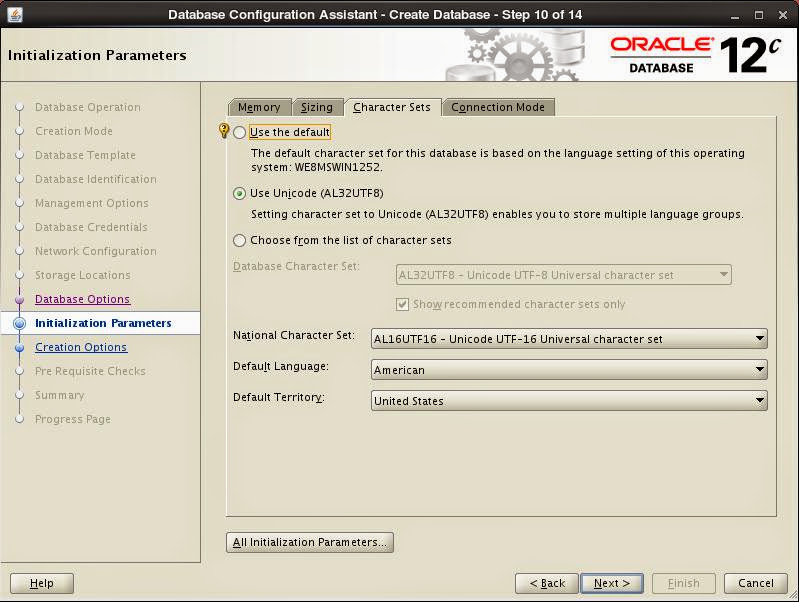
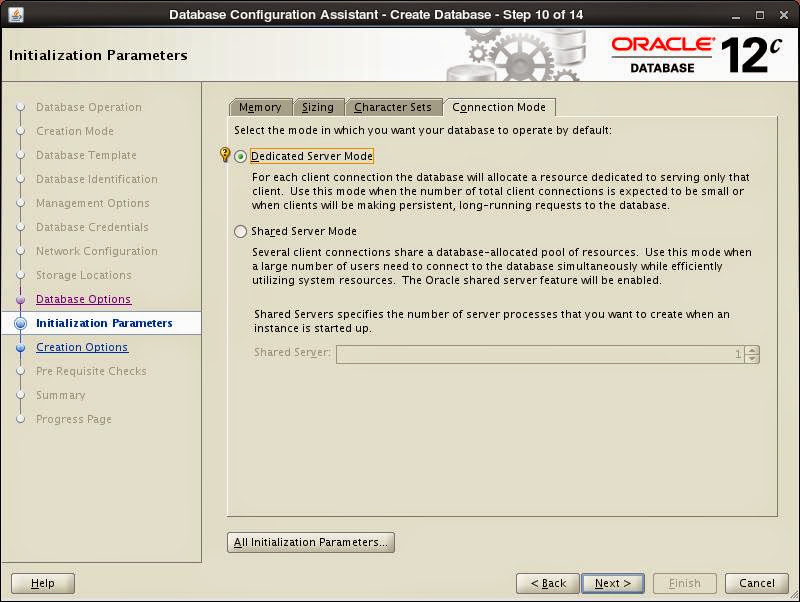
Set initialization parameters for memory management, number of Oracle processes, character set and connection mode:


After pre-requisite check installation starts. When finished, necessary information is displayed:

Enjoy and discover your first 12c database...
Performance Improvement for ODP.Net OracleDataAdapter
4/15/2013 08:24:00 PM
using (OracleConnection conn = new OracleConnection())
{
OracleCommand comm = new OracleCommand();
comm.Connection = conn;
comm.FetchSize = comm.FetchSize * 8;
comm.CommandText = "select * from some_table";
try
{
conn.Open();
OracleDataAdapter adap = new OracleDataAdapter(comm);
System.Data.DataTable dt = new System.Data.DataTable();
adap.Fill(dt);
}
finally
{
conn.Close();
}
}
Notice the line with blue font, fetch size of command object increased by 8 times its default which is 128 KB at ODP.Net 11.2.0.3. OracleDataReader also has the FetchSize property. By increasing fetch size, you increase the cache size in memory to fetch rows.
What we gained is up to 96% performance improvement. Here are some timings with different fetch sizes:
| Fetch Size | Timing (MI:SS.FF3) |
| Default (128 KB) |
05:20.290
|
| Default x 8 (1 MB) |
00:52.941
|
| Default x 32 (4 MB) |
00:26.008
|
| Default x 64 (8 MB) |
00:12.409
|
It's a easy way to improve your application's performance, isn't it.
Running Toad on Linux
3/17/2013 08:02:00 PM
If you want to use Linux as your desktop OS however want to keep using Toad, thanks to Wine it is possible. I've succeed running Toad 10.5 on 64-bit Ubuntu 12.10.

These are steps to install Toad:
1. Install Wine
$ sudo add-apt-repository ppa:ubuntu-wine/ppa
$ sudo apt-get update
$ sudo apt-get install wine1.4
2. Configure Wine as 32-bit. Since you are running a 64-bit OS, Wine runs 64-bit basis as well. However Toad is a 32-bit application that requires 32-bit Oracle client. Therefore you need configure Wine to run on 32-bit basis.
$ rm -rf ~/.wine*
$ WINEPREFIX='/home/<user_name>/prefix32' WINEARCH='win32' wine 'wineboot'
3. Install requirements. I recommend installing .Net Framework first because it's a bit problematic and takes the longest time. During its setup, you will be asked to download different versions and place into Winetricks's cache directory. So you will need to run the command several times.
$ winetricks dotnet35sp1
After successfully completing previous step, install rest of the requirements.
$ winetricks gecko fontfix gdiplus msxml3 msxml4 msxml6 vcrun2005sp1 vcrun2008 winxp volnumcd
4. Install Oracle Client. Copy installation files of Oracle Client for 32-bit Windows into ~/.wine/drive_c/tmp. Unzip the installation and run setup. During setup, choose "Runtime" option and ignore any prerequisite check failures.
$ wine "c:\tmp\client\setup.exe"
Do not forget to copy your tnsnames.ora file to ~/.wine/drive_c/app/<user_name>/product/11.2.0/client_1/network/admin after setup.
5. Install Toad. You might copy setup file again into ~/.wine/drive_c/tmp as well. To run setup:
$ wine "c:\tmp\toad.exe"
6. Run Toad. Installation creates desktop shortcuts, so it's possible to run Toad from these shortcuts or directly through Wine:
$ wine "C:\Program Files\Quest Software\Toad for Oracle 10.5\Toad.exe"
or
$ wine ~/.wine/drive_c/Program\ Files/Quest\ Software/Toad\ for\ Oracle\ 10.5/Toad.exe
Enjoy Linux
Data Pump Options
1/30/2013 10:38:00 PM
1. Create a directory in ASM disk group:
SQL> alter diskgroup RECOVERY add directory '+RECOVERY/DPUMP';
2. Create a directory in the database pointing to the ASM directory:
SQL> create directory ASM_DIR as '+RECOVERY/DPUMP';
3. Grant write on directory created above to the user you'll use while exporting:
SQL> grant read, write on ASM_DIR to <export_user>;
3. Create database a link:
SQL> create public database link target_db connect to <remote_user> identified by <password> using '<tns_entry>';
It's required that both the local and remote users are granted to the EXP_FULL_DATABASE role.
Exporting
Now it's time to export. At local server, run:
$ expdp NETWORK_LINK=target_db DUMPFILE=ASM_DIR:dump_file.dmp LOGFILE=DATA_PUMP_DIR:export.log FULL=Y EXCLUDE=STATISTICS COMPRESSION=ALL PARALLEL=8
To briefly explain parameters given:
- NETWOK_LINK is the one pointing to remote database. This is how we export remote database.
- As you may see, dump file is being created under directory ASM_DIR pointing the directory in ASM disk group.
- Notice that log file is not being created under ASM directory because it's not supported. That's why I've used default data pump directory. Also you may choose not to log by using parameter NOLOGFILE=Y instead.
- We're having a full database dump by using FULL=Y parameter. Instead you may use SCHEMAS, TABLES or TABLESPACES parameters to export/import only given schemas/tables or tablespaces.
- Our dump will not include statistics because of the parameter EXCLUDE=STATISTICS. You can use this option to exclude other objects such as tables or indexes, too. I choose to exclude statistics because I'd rather gather statistics at the database I'm going to import the dump.
- By means of the parameter COMPRESSION we'll have a smaller sized dump file. To give a hint how much could it be reduced in size, here is a few statistics I've had with different characteristics of data:
| Estimated | Actual | Gain Percentage |
| 687.7 MB | 188.13 MB | 72.64% |
| 154.3 GB | 56.44 GB | 63.42% |
| 287.2 GB | 207.93 GB | 27.6% |
- Lastly, to improve performance we use the parameter PARALLEL. Data pump is a tool you can get full advantage of parallelism. Therefore it's good to use as much as possible.
After exporting you can query and check dump files. To query files exported under ASM:
SQL> select a.name, f.bytes/1024/1024 mb, f.creation_date
from v$asm_file f, v$asm_alias a
where f.file_number=a.file_number and a.system_created='N' and f.type='DUMPSET';
To check dump file, best tool to use is again data pump, use parameter SHOW:
$ impdp DUMPFILE=ASM_DIR:dump_file.dmp NOLOGFILE=Y FULL=Y SHOW=Y
Finally, if you need to copy the dump file to somewhere else, it could be achieved by asmcmd tool:
$ asmcmd -p cp RECOVERY/DPUMP/dump_file.dmp /destination_directory

