Oracle Database Network Bandwidth Usage
4/29/2012 03:25:00 PM
Even it is not in the list of DBA's responsibilities essentially, time to time you may be asked for the required bandwidth value for your database. It could be for capacity planning of the WAN line between primary and disaster recovery sites or calculating traffic towards database by means of data streams etc.
Besides various networking tools, it is possible to calculate amount of data generated by monitoring usage of redo logs. Actually this is the suggested way to find out required bandwidth for Data Guard installations by Oracle.
The metric to calculate bandwidth is "Redo Generated Per Sec". You can schedule a job that collects statistics regularly, say hourly. Script below inserts maximum and average values of the metric into a table with time stamp:
insert into bandwidth
(
select sysdate, max(value) as max_val, avg(value) as avg_val
from gv$sysmetric_history
(
select sysdate, max(value) as max_val, avg(value) as avg_val
from gv$sysmetric_history
where metric_id = 2016
);
The formulation to calculate bandwidth is:
Required bandwidth = ((Redo rate bytes per sec. / 0.7) * 8) / 1,000,000 = bandwidth in Mbps
Since you have collected enough data, you can figure out the peak and average bandwidth:
select
((max_val/0.7)*8)/1000000 as peak_mbps,
((avg_val/0.7)*8)/1000000 as average_mbps
from bandwidth;
from bandwidth;
Upgrading Oracle Enterprise Manager 11g Grid Control to 12c Cloud Control with Exadata Plug-ins
4/26/2012 06:21:00 PM
As you might know OEM 12c Cloud Control is out there for some while, even its bundle patch 1 has been released. 12c comes with a fully re-designed user interface and new Exadata features which takes my attention the most. To take advantage of these new features I've decided to upgrade my 11g box to 12c. What I have is a 64-bit Oracle Linux 5.7 with 11gR2 database and 11g Grid Control with Exadata plugins installed.
There are three upgrade approaches suggested by Oracle. I'll follow the 1-System Upgrade Approach which is in-place upgrade with minimal downtime. After upgrading to 12c, I'll discover my database machine through 12c console and implement Exadata 12c integration.
Upgrading 11g Grid Control to 12c Cloud Control with 1-System Upgrade Approach:
1. As in every upgrade and patching, first thing to do is upgrading OPatch. Since we'll patch OMS 11g during upgrade process, we need to upgrade OPatch under OMS_HOME. Download latest OPatch from MOS 6880880 for release 11.1 and:
$ unzip p6880880_111000_Linux-x86-64.zip -d <OMS_HOME>/
2. As a prerequisite if you haven't installed OMS 11g PSU 1 (10065631), you should install it. Actually this is the prerequisite for installing preupgrade console. Download the PSU then:
$ unzip p10065631_111010_Generic.zip
$ <OMS_HOME>/OPatch/opatch prereq CheckConflictAgainstOHWithDetail -phBaseDir ./10065631
If no conflict is found
$ <OMS_HOME>/bin/emctl stop oms
$ cd 10065631
$ <OMS_HOME>/OPatch/opatch apply
$ export ORACLE_HOME=<OMS_HOME>
$ <OMS_HOME>/bin/rcuJDBCEngine sys/<Password>@<host_name>:<db_sid> JDBC_SCRIPT post_install_script.sql $PWD $ORACLE_HOME
$ <OMS_HOME>/bin/rcuJDBCEngine sys/<Password>@s<host_name>:<db_sid> JDBC_SCRIPT post_install_pactht.sql $PWD $ORACLE_HOME
$ <OMS_HOME>/bin/emctl start oms
3. Now we can install preupgrade patch. You can download it from OTN.
$ unzip p13597150_111010_Generic.zip
$ <OMS_HOME>/bin/emctl stop oms
$ <OMS_HOME>/bin/emctl start oms
$ cd 13597150
$ <OMS_HOME>/OPatch/opatch apply
$ <OMS_HOME>/bin/rcuJDBCEngine sys/<Password>@<host_name>:<db_sid> JDBC_SCRIPT $ORACLE_HOME/sysman/preupgc/puc_dblink_pkgdef.sql
$ <OMS_HOME>/bin/rcuJDBCEngine sys/<Password>@<host_name>:<db_sid> JDBC_SCRIPT $ORACLE_HOME/sysman/preupgc/puc_dblink_pkgbody.sql
$ <OMS_HOME>/bin/rcuJDBCEngine sysman/<Password>@<host_name>:<db_sid> JDBC_SCRIPT $ORACLE_HOME/sysman/preupgc/pre_upg_console.sql
$ <OMS_HOME>/bin/emctl start oms
4. Now we are ready to start upgrading. Upgrade starts with agents. Log on to 11g console, at the Deployment tab click on the new link "Enterprise Manager 12c Upgrade Console" then "Manage Software". At the Software Location area write the directory of new plugins and click validate.
To have plugins you can unzip all three disks of 12c those you have downloaded from OTN or you can just extract the plugins directory from the third disk. You also need to put the new version of agent(s) you have. You can download the one(s) from OTN too.
There are two things to notice here. First, you must not extract the agent software zip file while putting under plugins directory. And the second is that there is no agent for Windows, not yet for 64-bit version and never ever going to be for 32-bit. So if you have a 32-bit Windows agent running you will not be able to use it with 12c.
When you click on validate a job will run and analyze your agent(s). Your agent(s) might fall into one of these groups:
- Completely Upgradable - A non-windows agent with no or upgradable plugins.
- Missing Plug-Ins Software - A non-windows agent with not upgradable plugins. My agents falls in this category since it is a Linux agent with Exadata plugins. Starting from 12c, Exadata features are included in OEM, so no plugin is required.
- Missing Agent Software - Agent software is not available
- Not Supported - A Windows agent
5. After verifying agent(s), upgrade them by following steps below described in Oracle documentation. First three steps will create a job, you can find job output screen in each step:
a) Deploy and configure the software binaries of Oracle Management Agent 12c

b) Generate a health report and check the readiness of the predeployed Management Agents

c) Verify and sign off the health check report
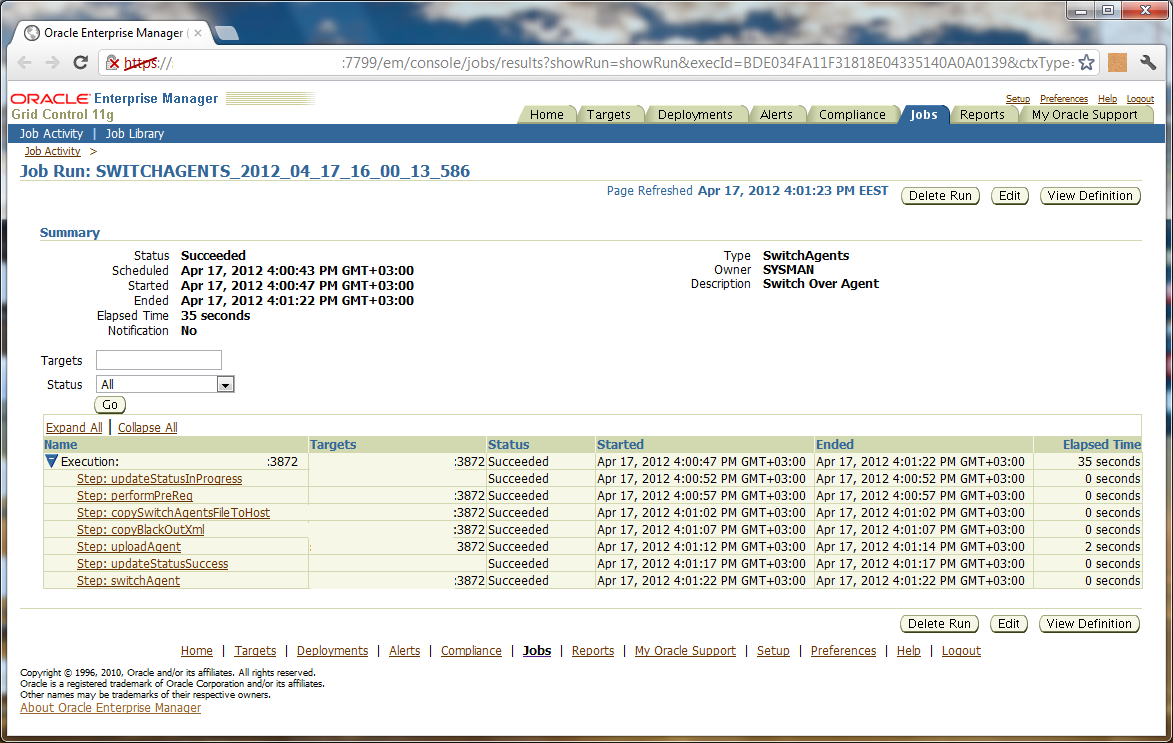
d) Switch over the old Management Agents to the newly deployed ones so that they can communicate with Enterprise Manager Cloud Control
Check the status of upgraded agent:
$ <AGENT12c_HOME>/agent_inst/bin/emctl status agent
Copyright (c) 1996, 2012 Oracle Corporation. All rights reserved.
---------------------------------------------------------------
Agent Version : 12.1.0.1.0
OMS Version : (unknown)
Protocol Version : 12.1.0.1.0
Agent Home : <AGENT12c_HOME>/agent_inst
Agent Binaries : <AGENT12c_HOME>/core/12.1.0.1.0
Agent Process ID : 19089
Parent Process ID : 18963
Agent URL : https://<host>:3872/emd/main/
Repository URL : https://<host>:4900/empbs/upload
Started at :
Started by user : oracle
Last Reload : (none)
Last successful upload : (none)
Last attempted upload : (none)
Total Megabytes of XML files uploaded so far : 0
Number of XML files pending upload : 69
Size of XML files pending upload(MB) : 0.07
Available disk space on upload filesystem : 21.46%
Collection Status : Collections enabled
Last attempted heartbeat to OMS :
Last successful heartbeat to OMS : (none)Last Reload : (none)
Last successful upload : (none)
Last attempted upload : (none)
Total Megabytes of XML files uploaded so far : 0
Number of XML files pending upload : 69
Size of XML files pending upload(MB) : 0.07
Available disk space on upload filesystem : 21.46%
Collection Status : Collections enabled
Last attempted heartbeat to OMS :
---------------------------------------------------------------
Agent is Running and Ready
6. It's time to upgrade OMS. Copy emkey from the OMS to the Management Repository and stop OMS service as prerequisite and then run the graphical installer from the directory you have unzipped the 12c CDs.
$ <OMS_HOME>/bin/emctl config emkey -copy_to_repos_from_file -repos_host <host_name> -repos_port 1521 -repos_sid <db_sid> -repos_user sysman -emkey_file <OMS_HOME>/sysman/config/emkey.ora
$ <OMS_HOME>/bin/emctl stop oms
$ ./runInstaller
$ <OMS_HOME>/bin/emctl stop oms
$ ./runInstaller


During prerequisite check if anything found an error screen will appear as below, click yes to make the installer fix the issue

Also some best practices and performance recommendations may appear in a warning window. You can implement them after installation


You may now log on to new OMS Console.
Discovering Exadata Through 12c
1. First thing to do before start monitoring Exadata through 12c is installing 12c agents to database nodes. As you know, it is strictly disallowed to install anything on storage cells, therefore all Exadata components are monitored by agents on database nodes. Download agent software from MOS, bug number 12960610. In the zip file there is file named CloudControl_Standalone_12.1.0.1.0_LINUX.X64.tar.Z, copy it to first node under /tmp/emkit directory.
An important point here to pay attention is em.param file. The file is generated by Oracle Exadata Database Machine Configurator Spreadsheet and it should be located as /opt/oracle.SupportTools/onecommand/em.param. If not, you need to generate one. Once you have one, you have to add or modify the following lines properly:
OMS_LOCATION = MY_GC
EM_BASE = / u01/app/embase
OMS_HOST = oemserver.company.com
OMS_PORT = 4900
EM_USER=oracle
EM_PASSWORD=<password>
Do check the port number by running following command on OEM server:
$ emctl status oms -details
Look for the "Upload HTTPS Port" in the output.To install agent, as root:
$ tar xBvpf CloudControl_Standalone_12.1.0.1.0_LINUX.X64.tar.Z
$ cd /tmp/emkit/common
$ (sh setupem.sh -emOnly -emUser <em_user> -emBase <em_base> | tee /tmp/setupem.log) 3>&1 1>&2 2>&3 | tee /tmp/setupem.err
2. After installation of OEM 12c Agent for Exadata, it is time to discover database machine. Though, before starting do check the Exadata Database Machine Schematic file located as /opt/oracle.SupportTools/onecommand/databasemachine.xml. Its version must be at least 502 and well-formed as XML (In my case, I had problems, while discovery process, due to some invalid characters in the file). Instead of trying to fix errors later the hard way, fix simply in the beginning.
Log on to 12c console. From the Setup menu, Add Target --> Add Targets Manually. Choose "Add Non-Host Targets Using Guided Process (Also Adds Related Targets)", select Oracle Exadata Database Machine from the Target Types and click "Add Using Guided Discover". To start the discovery wizard select "Discover a new Database Machine and its hardware components as targets" and click Discover Targets.
Go till the end of the wizard, process takes a little while to complete. At the end, you got your Exadata manageable via 12c Cloud Control.

Subscribe to:
Posts (Atom)

